Thursday, June 4, 2015

Stitch Fix Box #3


Yay for new clothes!  I kept a couple items, returned some too.


 I swam in this top. Sleeves too long, too much material for me.  I'm not sure I actually like this style on me (though I do on other people).


I felt pregnant in this top.  And it's too busy for me.  Enough said.


 Both the top and bottoms I'm keeping!!  Love them both. Super cute and comfy.  And the pants are not jeans or yoga pants. Amazing!


The last item in my box was a bag.  I carry a diaper bag, and carrying another bag just won't happen in my life, so it's going back.

Thursday, April 9, 2015

Stitch Fix Box #2

I'm keeping two items from this box!


This top is totally not something I would have picked out for myself, mostly because it is more blouse-like than what I normally wear.  But it's such a good spring color that I'm keeping it. I actually feel like I have style!


This top looks like me, so it was a given.


This top is pretty much like a t-shirt, though it's knit and is cut a little better.  The kicker for me is that it's grey, and I look totally washed out in grey.  So it's going back.


My stylist was brave and decided to send me a pair of jeans.  Beside being about six inches too long (which is an easy fix), but they are about three inches too big in the waist.  It is SO HARD to find jeans that fit me, and I think the Levi's that I have are a better fit.  So these are going back.


I just feel frumpy in this dress.  It's cute, but not my style.


Overall I kept two super cute items, and the best part is that I didn't have to go to a store for them. And I know they are in style, which is great because I have no idea what is in style these days!

Saturday, March 7, 2015

My First Stitch Fix Box

I recently received my first Stitch Fix box, and I thought this post would be helpful to show my "personal shopper" how I look in my clothes.


Both the top and the leggings were suggestions from Stitch fix.  I felt like the top looked like pajamas on me, and as my problem area is my thighs, I felt like the leggings just accentuated them.  Though comfortable, I don't know that I would ever feel comfortable enough to leave the house in them.  So both of these were returned.


Another view of the leggings.  Just not my style!


This top was in my box, and it is very cute and comfy.  So comfy that I broke down and bought a pair of straight leg jeans to wear with it.

Definite keeper!


A scarf that came in my box.  Beige and orange are not my colors, and I felt a little lost in the scarf. Plus my kids would just stain it and it looked like it would snag on everything.


I really liked this top when I tried it on, though in the picture I think it looks frumpy.  I returned it because it itched.  Not sure why, it's cotton, but I returned it because itchy clothes do not get worn.

And that's my first box!

Friday, November 30, 2012

Christmas Tree Felt Board

I know, I know. This website is supposed to be about recipes, right?  I have to admit that I have been stuck in a recipe rut.  With my busy, demanding (did I mention busy?!) toddler, and with the holidays fast approaching, I seem to be relying on the same nine or so recipes.  Hopefully this will pass soon and I can get back to cooking because I miss experimenting in the kitchen!

What I have been doing instead?  Well last weekend we decorated the house for Christmas and my almost two-year-old son is thoroughly enjoying all of the Christmas decorations.  Um, yes, that means that things are being "undecorated" daily in our house.

I decided to create a Christmas tree felt board for "Lolo" so he can decorate the tree whenever he wants.  I had hoped it would prevent him for taking the ornaments off our Christmas tree, but it hasn't.  The Christmas tree felt board is still a hit even though I have ornaments (more by the day) floating around the house as well.  Alas that is life with toddlers, right?

What I enjoy most about watching him decorate his tree is that he has to put the star at the top.  Where do our kids pick these things up? 

Hope you are enjoying the holiday season!

Sunday, November 11, 2012

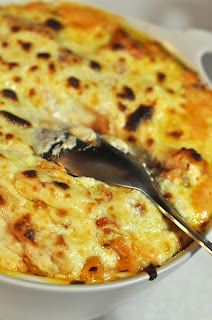
Rosy Mac ‘n’ Cheese

Ok, full disclosure: I did NOT cook this! Nope, fabulous my husband did.  I told my husband the other day that I was in the mood for comfort food, i.e. mac ‘n’ cheese.  He said what he always says, “ok.”  It was Saturday morning and I proceeded to walk out the door to go grocery shopping. 

When I arrived home from the store, I found him and my son sitting in front of the TV, pen in hand, watching America’s Test Kitchen.  It happened that they were making mac ‘n’ cheese on the episode, so dear husband was writing down the ingredients.  Can you say perfect timing?

Now here is the kicker: The version of mac ‘n’ cheese they were making had tomatoes in it.  My husband is allergic, and I mean really allergic, to tomatoes.  I took one look at him and said, “I am not making two different dishes for dinner.”

To that he responded, “Ok, I’ll do it.”

Not cook dinner?  You don’t have to say that twice! 

Not only did I get great mac ‘n’ cheese for dinner, but I didn’t even have to make it.  Talk about a good night! 

As mentioned, this recipe is adapted from America’s test kitchen. 

*If you are not gluten free, use regular pasta and the recipe will still be great.

Rosy Mac ‘n’ Cheese

1 lb gluten free pasta* (I like Trader Joe’s gluten free rotini)
2 cups half & half
1/2 cup chicken broth
1 – 28 oz can of diced tomatoes
4 tbsp oat flour or brown rice flour (or regular flour if you’re not gluten free)
3 tbsp butter
2 cups cheddar cheese, grated
1 cup sharp cheddar cheese, grated

1 tsp salt
1/4 tsp pepper
Dash of cayenne pepper

Preheat oven to 400 degrees.

Cook pasta until it is al dente. Drain and rinse in cold water.  Place in bowl and add can of tomatoes with liquid. Stir thoroughly.  Let sit for 15 minutes, stirring occasionally.  The pasta will soak up all the excess liquid from the tomatoes.

Melt butter in pan over medium heat.  Add flour and stir to create rue.  Once mixture is bubbly and starting to turn light brown, remove from heat.  While stirring, add chicken broth and half and half.  Return to heat, stirring constantly, until boiling. Simmer 10-15 minutes.  Remove from heat and add cheese and seasoning until well mixed. 

Combine pasta and sauce.   Cook in oven for 20-25 minutes, covered if you want all cheesey, uncovered if you like the top crunchy.

Monday, November 5, 2012

Sautéed Butternut Squash with Lemon & Pine Nuts

How did it get to be November already?!?  Wasn’t it  just last week it was getting dark at 8 p.m. and it was 75 degrees out?  Alas, summer is over and Thanksgiving is just around the corner.

As the leaves fall in my front yard, (and no, I haven’t gotten around to raking them yet) I took the time to prepare this butternut squash recipe for my family.  I wanted to share it with you now because this is a very pretty presentation for squash and a great side dish for Thanksgiving.  I modified the original recipe (like I do with most recipes) to eliminate tree nuts because my husband is allergic.
This is a pretty easy recipe, but if you can get someone else to cut up the squash I recommend it because it can be a workout!
This recipe can be made ahead for Thanksgiving and reheated for 30-45 minutes prior to eating.

Sautéed Butternut Squash with Lemon & Pine Nuts
2 tbsp olive oil
1 tbsp butter
1 butternut squash, peeled and cubed
Salt and pepper
1/4 cup loosely packed flat leaf parsley, chopped
3 oz pine nuts, toasted
1-1/2 tsp freshly grated lemon zest
Preheat oven to 350 degrees. Heat oil and butter in a pan over medium-high heat.  Add squash and season with salt and pepper to taste.  Cook, stirring frequently, for 8-10 minutes until squash is lightly browned (the edges will start to soften).  Add pine nuts, lemon zest and parsley and transfer to oven safe bowl. Bake squash for 25-30 min until hot and tender. 
If making this dish ahead for Thanksgiving dinner, sauté squash but do not bake it until just before you are ready to eat, and if it has been refrigerated it will need to bake for 30-45 minutes.

Friday, October 5, 2012

Easy Gluten-Free Crockpot Pot Roast

It is finally crockpot season! I will admit, I’m one of those strange people that use their crockpot when it’s 85 degrees outside. Mostly because I don’t want to stand at the stove to cook!  But alas, summer is over and it truly is crockpot season.

I have been looking for an easy, gluten free recipe for pot roast that actually has some flavor.  I can’t believe how hard it has been to make one that we actually like.  This is an extremely easy recipe to make when you don’t have time to cook, and it’s good!
Easy Gluten-Free Crockpot Pot Roast
2 to 3 lb pot roast (frozen is fine)
1/4 cup wheat free tamari sauce
1 pkg onion soup mix or French onion soup mix (make sure it’s gluten free)
2-3 cups water
Black pepper to taste
Combine tamari sauce, soup mix and water in crockpot. Add pot roast and more water if needed (don’t completely cover the pot roast with liquid).  Sprinkle the top of the pot roast with black pepper.  Cook on low heat for 7-9 hours.